
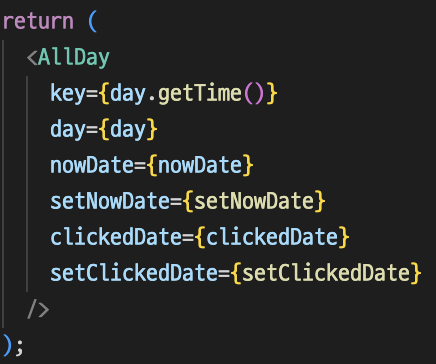
리액트를 사용하면서 위와 같은 수많은 Props를 하위컴포넌트로 전달해야하는 경우를 경험했을 것입니다.
간단히 만든 제 리따배 프로젝트에도 많이 볼 수 있는 상황인데요.
제가 진행하는 프로젝트에선 컴포넌트 수가 굉장히 적어 Props를 하위컴포넌트의 하위컴포넌트까지 전달해도 크게 힘들진 않지만
하위컴포넌트의 하위컴포넌트의 하위컴포넌트... 으로 Props를 전달해야하는 경우 굉장히 귀찮아집니다. 또 이런 반복되는 코드가 많을 수록 오류확률도 높아지고 코드 가독성도 떨어지죠.
* 이 처럼 사용하지도 않는 Props를 받아 바로 하위컴포넌트로 Props를 보내야하는 경우를 Props drilling이라고 부릅니다.
이런 문제를 해결하기 위해 사용하는 라이브러리가 바로 전역상태관리 라이브러리입니다.
라이브러리의 종류는 Redux,MobX,Context API,recoil이 있습니다.
이번 글에선 위 4가지 라이브러리중 Redux라는 녀석에 대해 알아보겠습니다.
Redux의 장점
- state를 쉽게 관리할 수 있습니다.
- Redux에서 상태를 불러온 컴포넌트만 렌더링할 수 있습니다.(Props를 사용하지 않는 컴포넌트 리렌더링 방지)
Redux의 단점
- 러닝 커브가 큽니다.
- 하나의 상태를 관리하기 위해서라도 준비해야하는 코드 양이 많습니다.
Redux사용방법
프로젝트 만들고 리덕스 추가하기
- 벨로퍼트님의 TypeScript에서 리덕스 프로처럼 사용하기의 글을 참고했습니다.
npx create-react-app reduxex --template typescript
yarn add redux react-redux @types/react-redux
일반적으로 많이 사용하는 ducks패턴을 이용해 redux를 구현해보겠습니다.
ducks패턴이란
리덕스와 관련된 파일들(action,reducer,store 등)을 한개의 폴더에 묶어 관리하는 방식을 의미합니다.
폴더구조는 다음과 같습니다.
src/modules ->
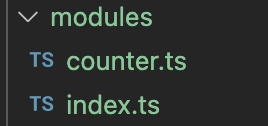
이 모듈이란 폴더안에서 관리하고 기능을 뽑아서 사용합니다.
index.tsx부터 천천히 올라가 분석해보겠습니다.
index.tsx
import React from "react";
import ReactDOM from "react-dom/client";
import "./index.css";
import App from "./App";
import reportWebVitals from "./reportWebVitals";
import { legacy_createStore as createStore } from "redux";
import { Provider } from "react-redux";
import rootReducer from "./modules";

const store = createStore(rootReducer);

const root = ReactDOM.createRoot(
  document.getElementById("root") as HTMLElement
);
root.render(
  <React.StrictMode>
    <Provider store={store}>
      <App />
    </Provider>
  </React.StrictMode>
);

// If you want to start measuring performance in your app, pass a function
// to log results (for example: reportWebVitals(console.log))
// or send to an analytics endpoint. Learn more: https://bit.ly/CRA-vitals
reportWebVitals();
위 코드에서 관심을 가져야 할 부분은 다음과 같습니다.
import { legacy_createStore as createStore } from "redux";
import { Provider } from "react-redux";
import rootReducer from "./modules";


const store = createStore(rootReducer);


<Provider store={store}>
  <App />
</Provider>
우선 처음에 설치했던 redux에서 legacy_createStore를 불러왔고 react-redux에서 Provider를 불러왔습니다.
Provider를 App컴포넌트를 덮어주는 모습과
store라는 props를 보냈고 그 store값은 createStore(rootReducer)네요.
그렇다면 rootReducer는 무엇일까요?
src/modules/index.ts
import { combineReducers } from "redux";
import counter from "./counter";

const rootReducer = combineReducers({
  counter,
});

// 루트 리듀서를 내보내주세요.
export default rootReducer;

// 루트 리듀서의 반환값를 유추해줍니다
// 추후 이 타입을 컨테이너 컴포넌트에서 불러와서 사용해야 하므로 내보내줍니다.
export type RootState = ReturnType<typeof rootReducer>;index.ts에서 rootReducer를 찾아볼 수 있는데요. 보시는 것과 같이 counter라는 리듀서를 저장한다는 것을 알 수 있습니다.
지금은 counter라는 예시로 리덕스를 만드는 거라 counter하나만 combineReducers에 넣어줬는데요.
다른 주제의 상태관리를 하고싶다면 counter처럼 ts파일을 하나 만들어주고 리듀서를 combineReducers안에 넣어주면 되겠습니다.
src/modules/counter.tx
// 액션 타입을 선언합니다
// 뒤에 as const 를 붙여줌으로써 나중에 액션 객체를 만들게 action.type 의 값을 추론하는 과정에서
// action.type 이 string 으로 추론되지 않고 'counter/INCREASE' 와 같이 실제 문자열 값으로 추론 되도록 해줍니다.
const INCREASE = "counter/INCREASE" as const;
const DECREASE = "counter/DECREASE" as const;
const INCREASE_BY = "counter/INCREASE_BY" as const;

// 액션 생성함수를 선언합니다
export const increase = () => ({
  type: INCREASE,
});

export const decrease = () => ({
  type: DECREASE,
});

export const increaseBy = (diff: number) => ({
  type: INCREASE_BY,
  // 액션에 부가적으로 필요한 값을 payload 라는 이름으로 통일합니다
  // 이는 FSA (https://github.com/redux-utilities/flux-standard-action) 라는 규칙인데
  // 이 규칙을 적용하면 액션들이 모두 비슷한 구조로 이루어져있게 되어 추후 다룰 때도 편하고
  // 읽기 쉽고, 액션 구조를 일반화함으로써 액션에 관련돤 라이브러리를 사용 할 수 있게 해줍니다.
  // 다만, 무조건 꼭 따를 필요는 없습니다.
  payload: diff,
});

// 모든 액션 겍체들에 대한 타입을 준비해줍니다.
// ReturnType<typeof _____> 는 특정 함수의 반환값을 추론해줍니다
// 상단부에서 액션타입을 선언 할 떄 as const 를 하지 않으면 이 부분이 제대로 작동하지 않습니다.
type CounterAction =
  | ReturnType<typeof increase>
  | ReturnType<typeof decrease>
  | ReturnType<typeof increaseBy>;

// 이 리덕스 모듈에서 관리 할 상태의 타입을 선언합니다
type CounterState = {
  count: number;
};

// 초기상태를 선언합니다.
const initialState: CounterState = {
  count: 0,
};

// 리듀서를 작성합니다.
// 리듀서에서는 state 와 함수의 반환값이 일치하도록 작성하세요.
// 액션에서는 우리가 방금 만든 CounterAction 을 타입으로 설정합니다.
function counter(
  state: CounterState = initialState,
  action: CounterAction
): CounterState {
  switch (action.type) {
    case INCREASE: // case 라고 입력하고 Ctrl + Space 를 누르면 어떤 종류의 action.type들이 있는지 확인 할 수 있습니다.
      return { count: state.count + 1 };
    case DECREASE:
      return { count: state.count - 1 };
    case INCREASE_BY:
      return { count: state.count + action.payload };
    default:
      return state;
  }
}

export default counter;
1. 액션 타입 선언
2. 액션 함수 선언
3. 모든 액션 객체에 대한 타입
4. 모듈에서 관리할 객체 타입, 초기상태선언
5. 리듀서 작성
이렇게 초기세팅을 마무리했습니다.
초기세팅을 마친 리덕스를 사용해보겠습니다.
src/components/Counter.tsx
import { useSelector, useDispatch } from "react-redux";
import { RootState } from "../modules";
import { increase, decrease, increaseBy } from "../modules/counter";

const Counter = () => {
  const count = useSelector((state: RootState) => state.counter.count);
  const dispatch = useDispatch();

  const onIncrease = () => {
    dispatch(increase());
  };

  const onDecrease = () => {
    dispatch(decrease());
  };

  const onIncreaseBy = (diff: number) => {
    dispatch(increaseBy(diff));
  };

  return (
    <div>
      <div>{count}</div>

      <button onClick={onIncrease}>{`+1`}</button>
      <button onClick={onDecrease}>{`-1`}</button>
      <button onClick={() => onIncreaseBy(5)}>{`+5`}</button>
    </div>
  );
};

export default Counter;react-redux라이브러리에서 useSelector,useDispatch를 불러옵니다.
RootState타입을 modules에서 불러옵니다.
리듀서가 들어있는 counter.ts에서 increase,decrease,increaseBy 액션함수를 불러옵니다.
컴포넌트 안에서 useSelector를 통해 count변수를 리덕스에서 불러왔습니다.
dispatch를 통해 각 액션을 dispatch해줍니다.
코드출처 : https://react.vlpt.us/using-typescript/05-ts-redux.html
5. TypeScript 에서 리덕스 프로처럼 사용하기 · GitBook
5. TypeScript 에서 리덕스 프로처럼 사용하기 이번 튜토리얼에서는 TypeScript 에서 리덕스를 프로처럼 사용하는 방법을 배워보도록 하겠습니다. 왜 제목이 "프로처럼" 이냐! 사실 조금 주관적입니다.
react.vlpt.us
다음 리따배 프로젝트에선 리덕스를 사용해 기능구현을 하고 영상을 올리도록 하겠습니다.
'React js' 카테고리의 다른 글
| cra없이 리액트 프로젝트 생성하기 두번째 파일구성 알아보기 (0) | 2022.11.28 |
|---|---|
| cra없이 react 프로젝트 설정하기(feat. webpack,babel) (0) | 2022.11.26 |
| useState란 무엇이고 왜 리액트에선 useState를 통해 값을 변경해야할까? (0) | 2022.11.22 |
| 리액트, useState를 사용해서 브라우저 값 변경하기 (0) | 2022.11.18 |
| 리액트에서 사용하는 VirtualDOM에 대해 알아보자 (0) | 2022.11.17 |